A Video Course For Upright Bass
Play two octaves in thumb position without a single shift.
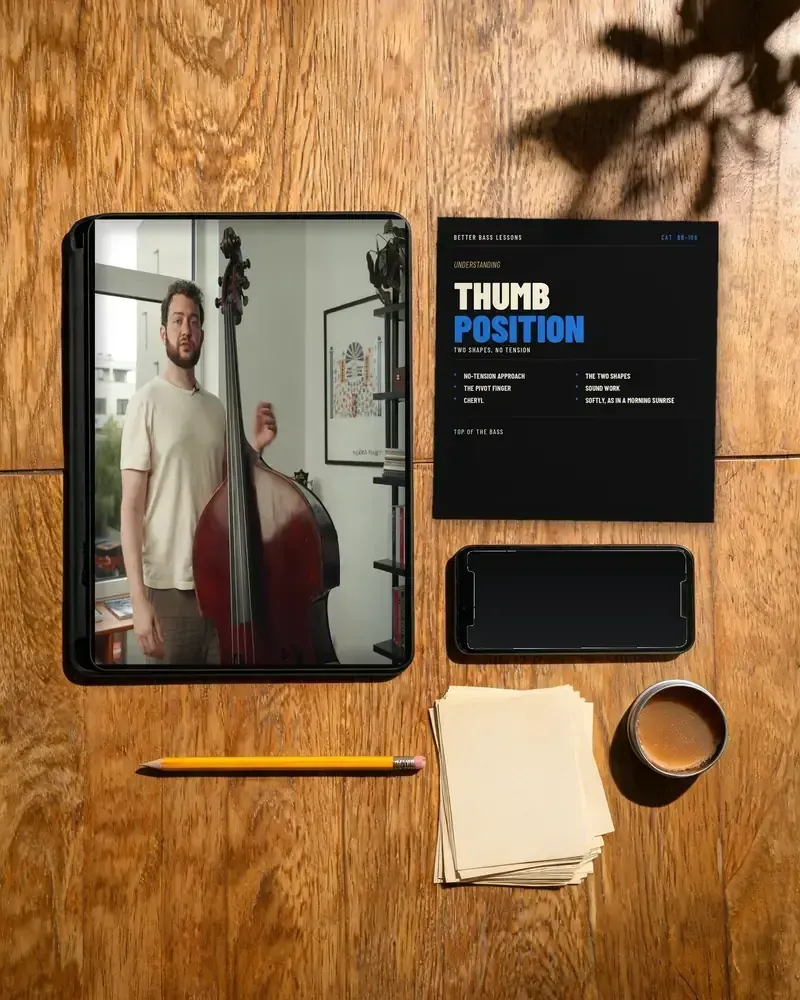
Understanding Thumb Position · By Cole Davis
From lesson 3: Why Thumb Position Is Easier Than Half Position
One payment · Lifetime access
Get Understanding Thumb PositionVideo course · Intro + 14 lessons · 30-day money-back guarantee
Most upright players only visit the top of the bass. They climb past the octave, play the last few notes of a scale and head straight back down. Up top is easier than half position. You just weren't shown how to get around it.
The two habits that make the top of the bass feel hard.
Here's what happens to most players the moment they go up there.
The bass comes off your left knee and leans on your shoulder. Your hand starts holding it up. Then your arm. Then your neck. You crouch over the instrument. You pin down fingers that don't need to be down. Your thumb starts to hurt. And your sound goes pinchy and choked up there.
Call it the squeeze. Every piece of it costs you something. Crouching over the bass causes problems in your lower back and your shoulders. The thumb pain shows up even at low action. And a choked sound doesn't carry.
Then there's the box.
Most of us learned thumb position as the top of a scale. You run a D major scale past the octave, touch the last few notes and come straight back down. That's not really thumb position. It's the first four or five notes of it.
If you were shown a shape up there at all, you were shown one. On the top two strings. With your thumb anchored on the 12th-fret harmonic (there's no fret, of course, but you know the spot).
Add the fingering that's common up there, and your hand sits in a box. There's not a lot of room for your thumb to move, so you head back down. And you can hear it in the melodies you play up there.
“That's what happens when you put your fingers in a box. It sounds like they're in a box.”
That's not your fault. It's not your hands either. Yours are most likely big enough.
The classic method book teaches thumb position the boxy, disconnected way for a real reason. That's what orchestral excerpts call for: the biggest, fattest, most accurate tone. Orchestral excerpts aren't about personality and swing. I've played in orchestras. I understand the job. But that's probably not your job.
Nobody showed you how to move the one shape you were given, or that there's a second one. Or that the thumb can go wherever it wants.
That's what Understanding Thumb Position is for.
Down low, E flat major costs me three shifts. Up top, it costs me none.
That's lesson 3, and it's the argument the whole course is built on.
Play an E flat major scale in the lower positions and you have to shift. I shift three times. Take the same scale up into thumb position and I don't shift at all. I play two full octaves of it without shifting once, and then I say the fingering out loud.
It comes down to the shape and the pivot.
The shape. In half position your hand manages a four-note shape. In thumb position it's a three-note shape. That's one note fewer to manage. There are two of those shapes, and most players only get taught one.
The pivot. Your thumb doesn't have to stay anchored on the harmonic. It can go anywhere, like a pivot foot in basketball.
“It's such little movement, but for some reason we think thumb position is harder.”
How do you move those shapes across all four strings? Where does the thumb go, and when? That's what the lessons show you, starting from the E string. Written down, it's a string of numbers. You need to see it and hear it, so it's all on camera.
Get those two things under your hand and you can:
- ✓Get from one end of thumb position to the other without shifting
- ✓Play whole scales up there, not just the top few notes of them
- ✓Keep the bass on your left knee so your arms and hands stay free
- ✓Make a melody sing instead of sounding boxy and disconnected
One honest thing: you'll still shift sometimes.
But it's amazing how much ground you can cover without ever shifting.
Watch my hands before you decide.
No trailer. Every clip on this page is cut straight from the course, so what you see is how it's taught.
Fourteen lessons and an intro. About an hour, in order.
It's chronological. You start with how your body's positioned on the bass, before a single note, and you finish improvising on a standard.
- ✓The posture I compare to “the first half of a swing.” (A lot of people do the opposite up there. That's where the back and shoulder trouble comes from.)
- ✓The body check to pass before you play a single note up there. (Fail it and you can still play in thumb position. You'll just burn a lot more energy doing it.)
- ✓My “five times” rule, the check that your hands and arms are free of tension. (It's easier to watch than to describe, so I show it on camera in lesson 1.)
- ✓What really controls the force of every note up there. (It's not where most people look. Let it sag and the sound goes limp.)
- ✓Why I start thumb position on the E string instead of the D. (Stay on the top two strings and you run out of room. Then you run out of ideas.)
- ✓The two fundamental shapes, and the one you most likely never got taught. (You've probably got the other one. On its own, it isn't enough.)
- ✓The E whole tone scale, from the harmonic E up to the D, without a single shift. (On the string a lot of people say isn't meant for thumb position.)
- ✓The common thumb position fingering I seldom use at all. (It locks your hand in a box. Press play at the top of this page and you'll see which one.)
- ✓All 12 major scales, played in thumb position. (How many can you play up there right now? Chances are, the answer's zero.)
- ✓Where your third finger belongs when it isn't playing. (It's different from what you do down low. Get it wrong and it causes too much pressure.)
- ✓Why I start a minor scale with my thumb on the B flat. (Once you try it, the idea that your thumb stays anchored on the 12th-fret harmonic stops being a rule.)
- ✓Why minor scales are some of the best things you can practice up there. (It comes down to one small interval, and how much room it frees up for your thumb.)
- ✓The biggest sound mistake players make in thumb position. (It sounds loud to you. From 30 feet away, you can't hear it at all.)
- ✓Which part of your thumb goes on the string. (A lot of players use the part that hurts, even at low action.)
- ✓Which hand makes your sound in thumb position. (Get it backwards and you'll work harder for a smaller sound. I show you side by side in lesson 4, with a walking bass line.)
- ✓Charlie Parker's Cheryl, in thumb position. (I play it in half position first, so you can count the shifts it saves.)
- ✓Softly, as in a Morning Sunrise, and why the usual fingering sounds “boxy and unswinging.” (You'll hear the fingering most people use, then mine.)
- ✓How to turn a melody's fingering into a path for improvising. (If you can play the melody, you can play this.)
The whole course in one video, about 69 minutes, for when you'd rather watch it straight through. It's also the only place you'll find the arpeggio work (A minor 7, F major and G major), plus a finger-strengthening drill that leaves a crease in your fingers for a few minutes afterward. (If you see the crease, you're doing something right.)
Built for the bassist who climbs past the octave and heads straight back down.
✓This is for you if…
- You play upright and avoid everything above the octave, or go up there and head straight back down
- You can play the top of a scale in thumb position, but not a whole scale
- You've only ever played thumb position on the G and D strings
- Your back, neck or shoulders complain when you play up there
- Your sound goes pinchy or choked above the octave
- You want melodies up there to sing instead of sounding boxy
- You've been told your hands are too small, or you've told yourself
×This isn't for…
- Electric-only players. Every lesson is on upright.
- Anyone who hasn't played in half position yet. The lessons compare thumb position to it throughout.
- Anyone after jazz vocabulary or licks. This isn't a vocabulary course.
- Anyone who wants a book or sheet music. This is video.
- Orchestral players who want orchestral fingerings. The standard ones already do that job.
- Anyone who can already play their major and minor scales up there, in tune, with a full sound and no tension. You don't need this.
If the second list sounds like you, skip this one. If the first does, keep reading.
One payment. $67. Lifetime access.
Understanding Thumb Position is $67, one time. No subscription. That's the intro, all 14 lessons and the full-length course video, and it stays in your Better Bass Lessons account for good.
Work it out per lesson and it's under $5 each.
Most of the students who ask me about thumb position can't play their major scales up there. It's not a huge problem, because it's very easily fixable.
One payment · Lifetime access · 30-day money-back guarantee
You can get comfortable up there, even if…
- ✓Even if you've only ever played the top two strings up there. I start you on the E string.
- ✓Even if you can't play a single scale in thumb position yet. That's normal. Bass players just aren't asked to.
- ✓Even if your hands aren't big. Mine are massive. Yours are most likely still big enough.
- ✓Even if your action's high. I play pretty high action, on camera. If I can do it, you can too.
- ✓Even if somebody told you the E string isn't meant to be played up there. Then why is it on the instrument?
- ✓Even if Cheryl looks out of reach. I picked a hard melody first. The easier one comes right after it.
- ✓Even if you learned it the orchestral way. That way has a job. It's just a different job.
- ✓Even if nobody's ever going to pay you to play up there. Nobody pays me to either. I still use it on the gigs I do get paid for.
“If you want to have a voice on an instrument, it helps to know the whole instrument.”
Lesson 3
Get the top of your bass under your hand.
Four things I'd rather you hear from me now.
“I do have a course about jazz vocabulary, but that's not what this is. This is just about getting comfortable playing in thumb position.”
“It's not going to be a yoga class for the whole time, but to start, we have to get the physical positioning right.”
“I know that this is challenging, and the only reason why it's challenging is because you're not used to it.”
“So yes, this is a little more advanced, but this is really the next step.”
Why I play it this way.

I'm Cole Davis. I studied with Ron Carter, and I earned my Artist Diploma at Juilliard.
I've played in orchestras, so I understand why thumb position gets taught the way it does. I also play gigs and concerts where thumb position is an asset to what I do. Those are two different jobs.
The reason I can play melodies and bebop phrases up top is that I'm grounded in the low notes, on the E string. That's where this course starts you, too.
A lot of my students ask me about thumb position at some point. So I ask them: can you play your 12 major scales up there, or even some of them? The answer's usually no.
The course starts with how your body's positioned on the bass and ends with you improvising on a standard. It's the way I actually get around up there.
Questions before you buy.
Get around the whole top of your bass.
Starting on the E string.
Nobody showed you the second shape, or that the thumb can go wherever it wants. The lessons show you both, on camera.
$67 one time
Intro + 14 lessons · Full-length video · Lifetime access
Here's everything you get.
One payment · Lifetime access · 30-day money-back guarantee
Get The Course: $67P.S. Here's a test you can run before you decide. Pick up your bass and play an E flat major scale in the lower positions. Count your shifts. I count three. Now try to play two octaves of it in thumb position without shifting at all. I do it on camera in lesson 3. If you can't do it yet, you're where most of my students are when they first ask me about thumb position. That's exactly what this course is for.

Understanding Thumb Position
$67.00
Quantity